How To Build an Axe Throwing Target? Step-By-Step Guide
You might be new to axe throwing and want to set up axe throwing in the backyard or personal space to enhance your skills. Obviously, it requires consistent practice but you will need proper instructions according to World Axe Throwing League (WATL) or International Axe Throwing Federation (IATF) standards to the target board.
Building an axe-throwing target in accordance with these standards will not only make it durable but safer too. The board must not be too hard or too soft because the over-harder board can be shattered after a few hits and even can result in bouncing back the axe which could result in damage to the thrower while the over-soften boards may not be durable.
Moreover, you need to build the board according to WATL or IATF dimensions and practice on it in order to compete with others when you play in a league.
This guide is a step-by-step process for how to build an axe throwing target where I will show you what you will need and how to assemble everything!
Which Is The Best Wood For Axe Throwing Target?
Choosing the right target wood for axe throwing is essential. It is because the wood may splinter into pieces after one solid hit or even lead to injuries if the wood is too hard.
Following are the woods I personally recommend:
- Cottonwood: This wood is softer and is the first choice for most throwers because of its softness. As a result, it catches and holds the axe, preventing the axes to bounce back or fall down after hitting the board.
- Pinewood: It is a bit harder than the cottonwoods, which needs a little solid hit to catch and hold the axe. However, many experienced players enjoy playing with this wood as it offers some challenges to them.
There are more budget-friendly options available, you can refer to this guide on what wood to use for axe throwing which will give you a clear idea of choosing the right one with its pros and cons.
Materials You Will Need For Building An Axe Throwing Target
I have listed the material you will need in order to make a perfect and durable target board and that too in accordance with international standards. So, here is all that you need with appropriate sizes in terms of length, width, and recommended thickness.
| Material | Thickness(Inches) | Width(Inches) | Height(Inches) |
|---|---|---|---|
| 2 bottom lengths | 2 | 4 | 72 |
| 3 bottom spreader lengths | 2 | 4 | 45 |
| 2 upright vertical lengths | 2 | 4 | 84 |
| 2 diagonal support beam lengths | 2 | 4 | 88 |
| 2 upright vertical length spreaders | 2 | 4 | 42 |
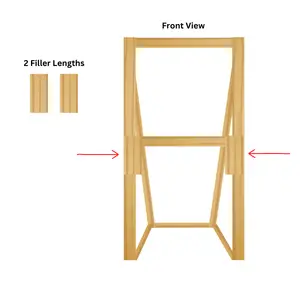
| 2 filler lengths | 2 | 4 | 8 |
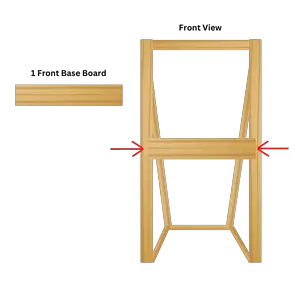
| 1 front base/ledge board | 2 | 10 | 48 |
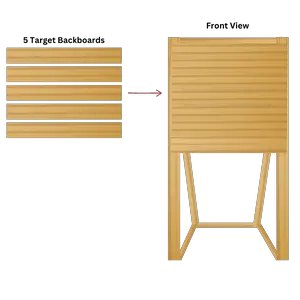
| 5 target backboards | 2 | 10 | 48 |
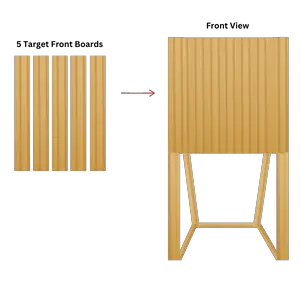
| 5 target front boards | 2 | 10 | 48 |
| Tools |
|---|
| Deck screws(100+) |
| Measuring tape |
| Level |
| Drill |
Assemble Everything To Build A Target Stand And Throwing Board
Now that you have all the things needed to make your own axe throwing target, it’s time to put together everything to give it a usable shape.
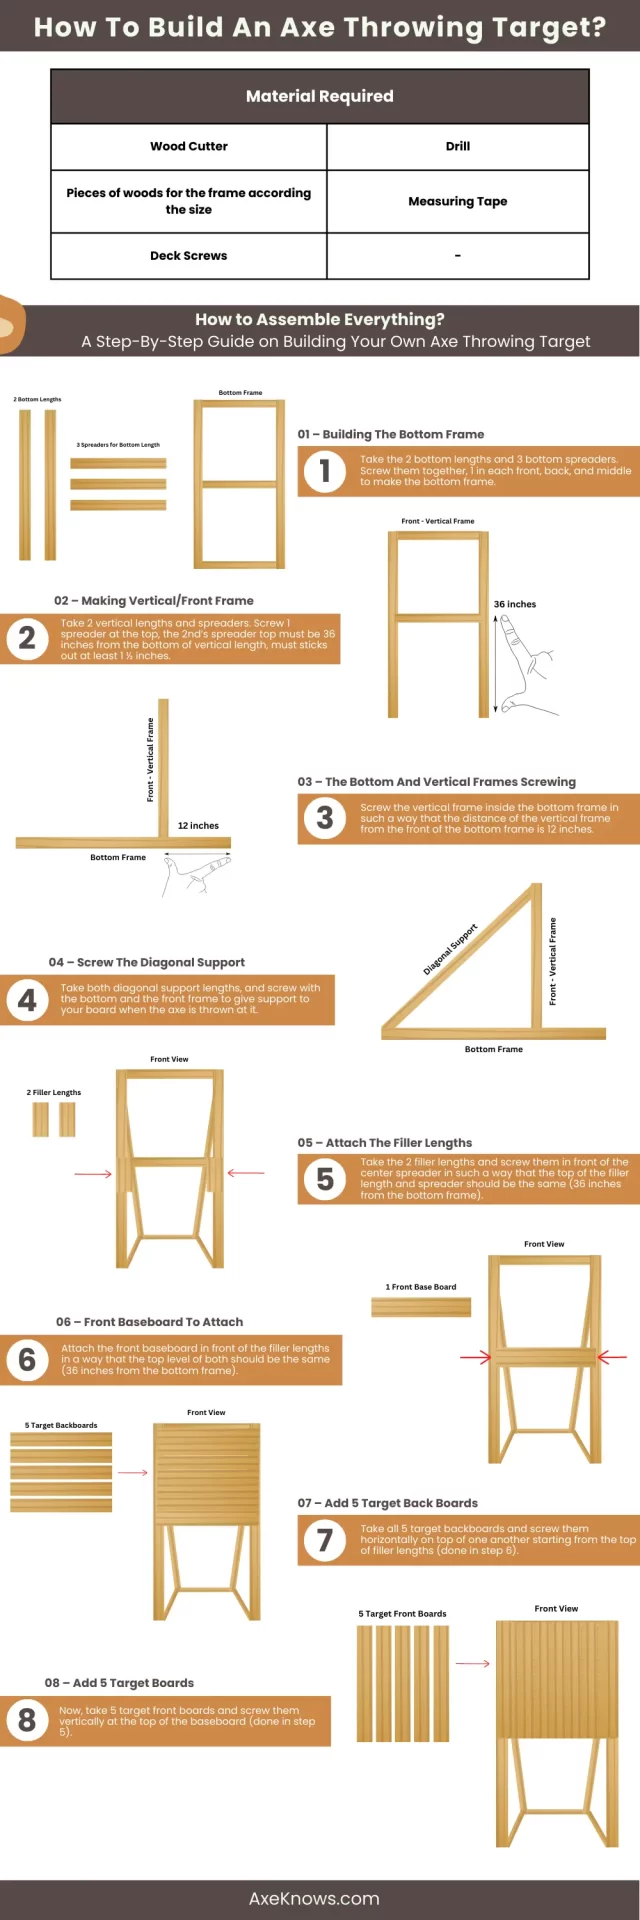
Step 1: Building The Bottom Frame
Take the 2 bottom lengths and 3 bottom spreaders. Screw them together, 1 in each front, back, and middle to make the bottom frame.


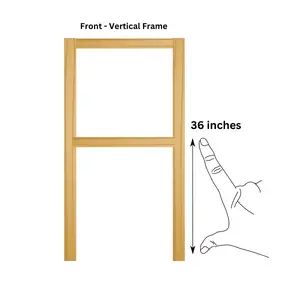
Step 2: Making Vertical/Front Frame
Now, take 2 vertical lengths and 2 vertical spreaders. Screw 1 spreader at the top, the 2nd’s spreader top must be 36 inches from the bottom of vertical length, and also it much sticks out at least 1 ½ inches (to give support to backboards in Step 7)
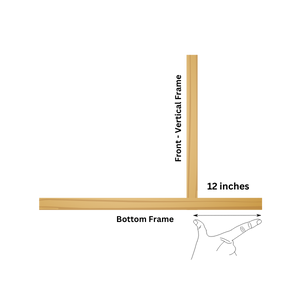
Step 3: The Bottom And Vertical Frames Screwing
Screw the vertical frame inside the bottom frame in such a way that the distance of the vertical frame from the front of the bottom frame is 12 inches.
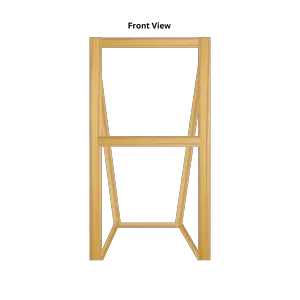
Step 4: Screw The Diagonal Support
Take both diagonal support lengths, and screw with the bottom and the front frame to give support to your board when the axe is thrown at it.

Step 5: Attach The Filler Lengths
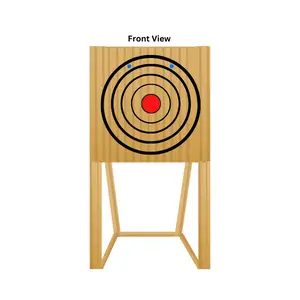
Now see the front view first, then take the 2 filler lengths and screw them in front of the center spreader in such a way that the top of the filler length and spreader should be the same (36 inches from the bottom frame). This is done to give a baseboard (step 6) something to screw into.
Step 6: Front Baseboard To Attach
Attach the front baseboard in front of the filler lengths in a way that the top level of both should be the same (36 inches from the bottom frame).
Step 7: Add 5 Target Back Boards
Take all 5 target backboards and screw them horizontally on top of one another starting from the top of filler lengths (done in step 6).
Step 8: Attach 5 Target Boards To The Front
Now, take 5 target front boards and screw them vertically at the top of the baseboard (done in step 5).
Perfect! Our target board is ready, the only step is left to paint it according to the axe throwing target measurements.
Still, have any queries, or need a demonstration? Walk through this quick video for a complete demonstration of what we have so far!
How To Paint An Axe Target?
There are 2 majorly used dimensions of the target board, WATL, and the IATF.
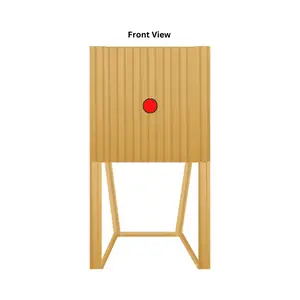
To start painting the dimensions according to any standard, we first have to identify the center of our board. Use the middle target front board (3rd out of 5) to determine the horizontal and vertical centers of the board and draw a small dot in the center.
WATL:
WATL axe throwing target dimensions has more outer rings but drawing the target is so easy because of their official stencil and markers. The best part of using these stencils and markers is you won’t need to worry about knowing the dimensions and making sure you have a measuring tape and different colors of markers with you.
Since we have identified the center and pointed it out with a dot, you just have to screw the stencil in the center.
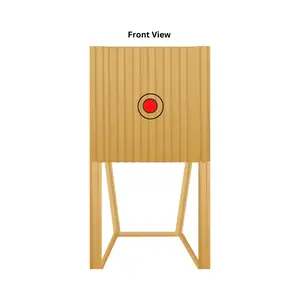
Once it has been screwed with the board, now simply take the black marker, place it inside the first hole, and rotate the stencil. The bullseye is drawn on the target board.
Take the red marker and fill the center circle, and you will similar to this!
Now, take the black marker again, put it inside the next hole, and rotate the stencil. Your outer ring close to the bullseyes is drawn.
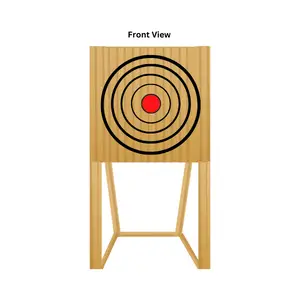
Repeat the process, for all the holes where their marker sticks out perfectly (leave the big hole for the next step) and you will end up drawing the entire board which would look similar to this image. Make sure to choose the right color of marker, mentioned in the image for each outer ring.
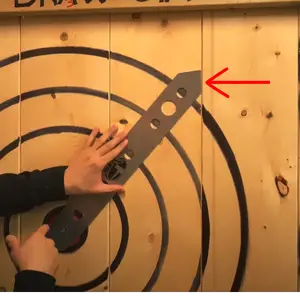
The last thing is drawing the killer shot. It is highly important to figure out the location of the killer shot. Simply rotate the stencil and make sure the edge is straight and line up with the board as shown in this figure.
And now, fill the hole between the two lines with a blue marker, and your killer shot for the right side will be drawn, repeat the same process for the left side killer shot.
Here is a video on how you can use WATL stencil and markers to draw the target board.
IATF:
You might be wondering if they have stencils and official markers. Unfortunately, they don’t! However, the dimension of IATF is quite simple and could be drawn without a stencil. Knowing the dimension is essential for IATF, below figure demonstrates the dimensions (in inches) of each ring inside the board including the bullseye.
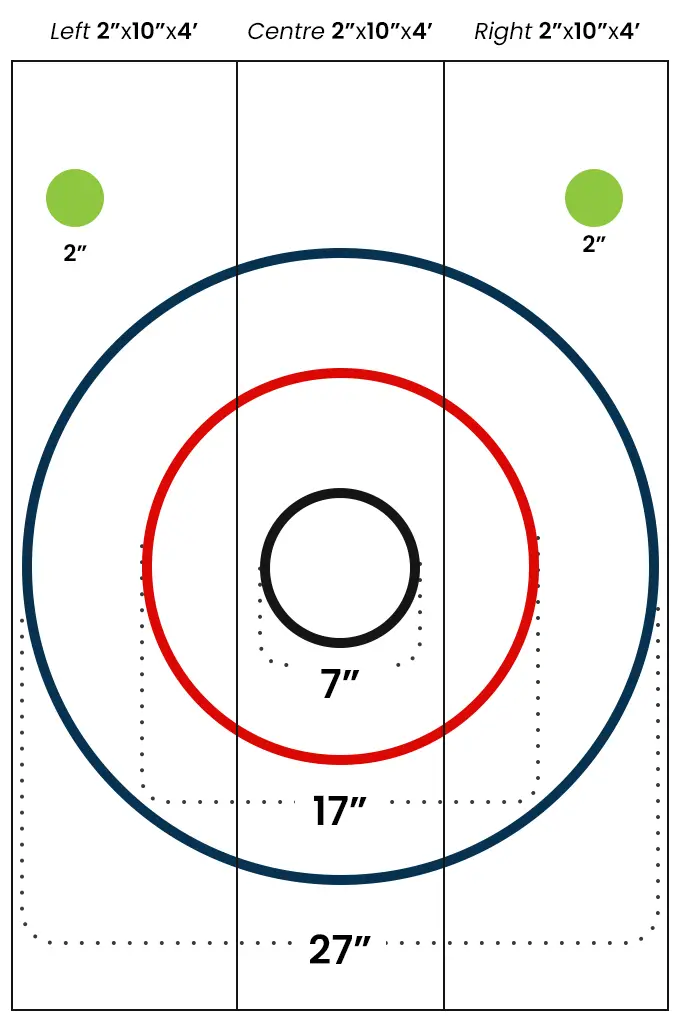
Screw the center of the axe throwing target, tie a thread with the screw, and take a measuring tape. Tie the black marker with thread 7 inches away from the center and rotate the marker along with the thread. You will end up drawing the Bullseye.
Repeat the process with relevant marker colors for other outer rings, 17 inches away and 27 inches away respectively and the target board will be completed by now.
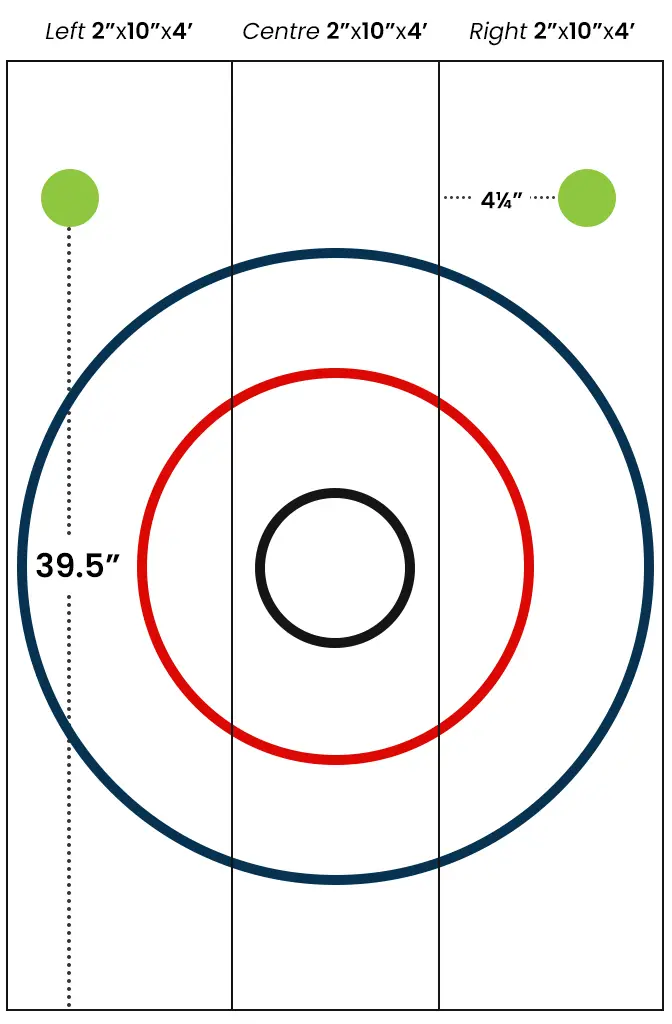
The last step is to draw the killer shot which they call, ‘Clutch’. The clutches are 39.5 inches away from the bottom of the target board and 4 ¼ inches away from the middle board, so use a measuring tape and draw a dot there.
The diameter of the clutches is 2 inches, so you can follow the same process of screwing the center and drawing it using a thread.
Which Target Dimensions Should You Use And Why?
I love using the WATL dimensions and would recommend you too. The reason is, their target dimensions have more outer rings. While practicing when you aim at them and hit the ring you had aimed at, increases your throwing accuracy. It’s not about hitting the bullseye all the time during practice, it’s about hitting the area you have aimed it. This will increase your accuracy, and will help you to aim and hit Killer shots!
Furthermore, if you miss your target by the barest of margin, you lose 1 point only whereas in IATF you lose 2 points as you hit in the farthest ring from the bullseye. Read the detailed guide on the axe throwing scoring system to understand how their scoring works and differs.